Disclosure: This website is a participant in various affiliate programs, including the Amazon Services LLC Associates Program, an affiliate advertising program designed to provide a means for sites to earn advertising fees by advertising and linking to Amazon.com. As an Amazon Associate, we earn from qualifying purchases. We also participate in other affiliate programs and may earn commissions through purchases made through our links. Any opinions, reviews, recommendations, or endorsements expressed on this site are our own and are not influenced by any third-party products or services being promoted.
Watch along on Youtube!

Instagram // Youtube // Etsy Shop
Subscribe for more videos and templates!
✦ What I used:
- Cottagecore sticker set →https://tidd.ly/3I5VMAT
- FREE digital planner → https://thebeigejournal.com/digital-planning-links/

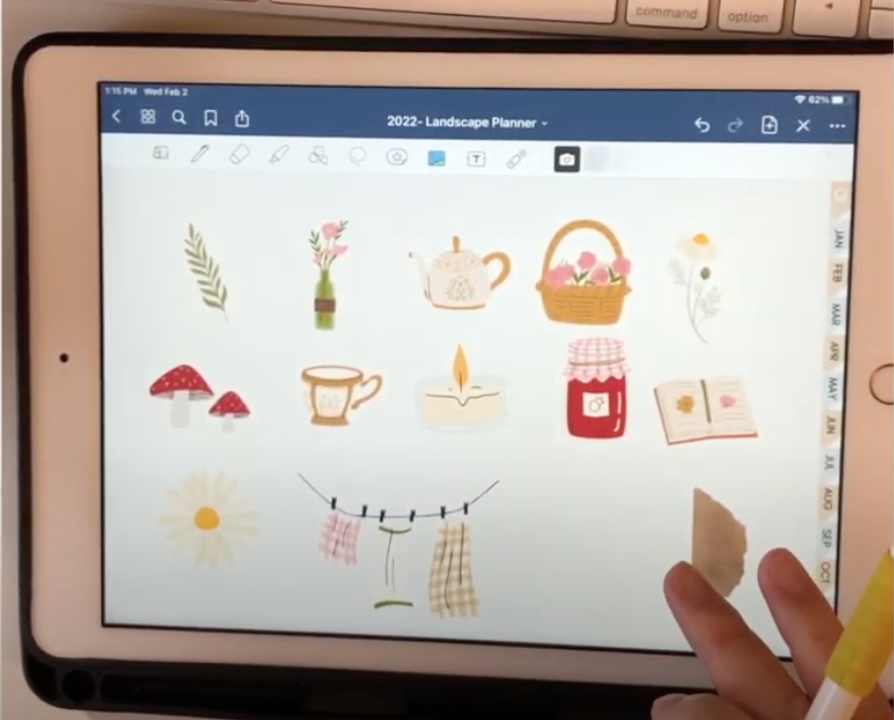
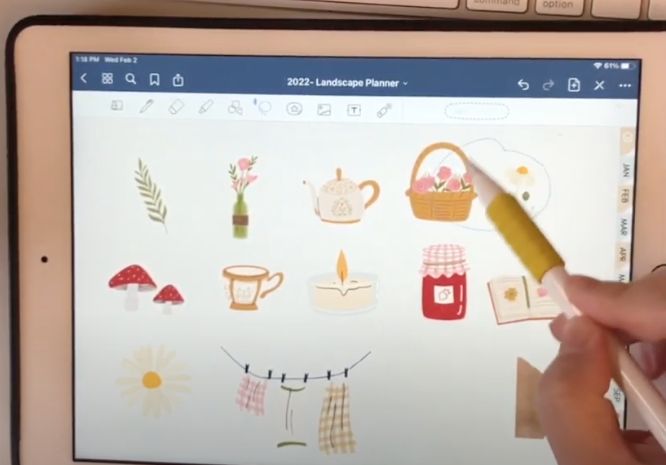
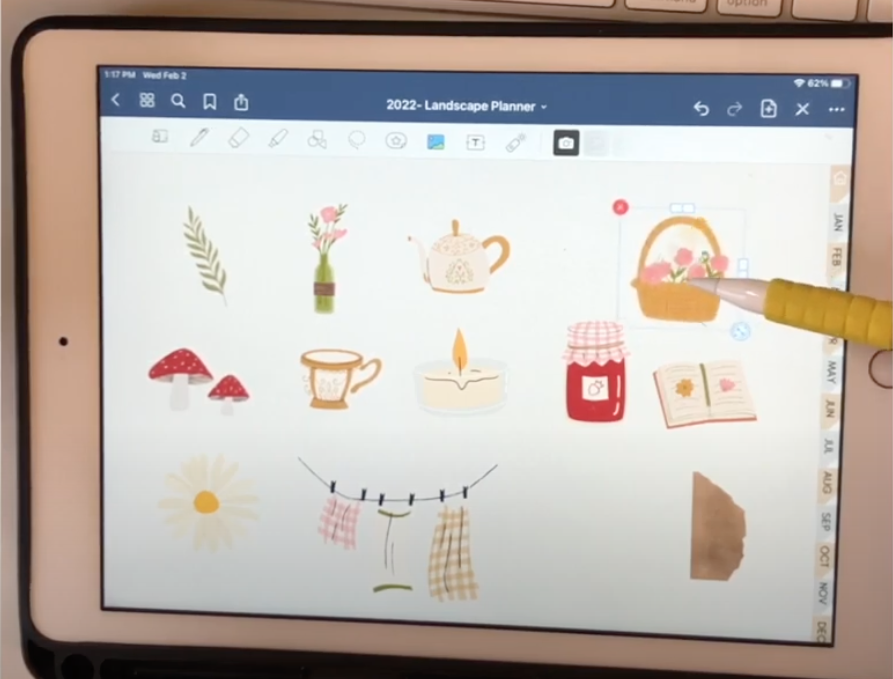
The best part of digital planning is having endless possibilities with stickers! But a common question is how to add and organize these so called stickers.
Let’s take a look at these options. (Check our video if these are unclear!)
What's covered in this post
How to add stickers
Drag and drop
- On your iPad, you’ll be able to split your screen in two or have a file pop up over your Goodnotes app.
- From there, you can drag your stickers over to a GoodNotes page
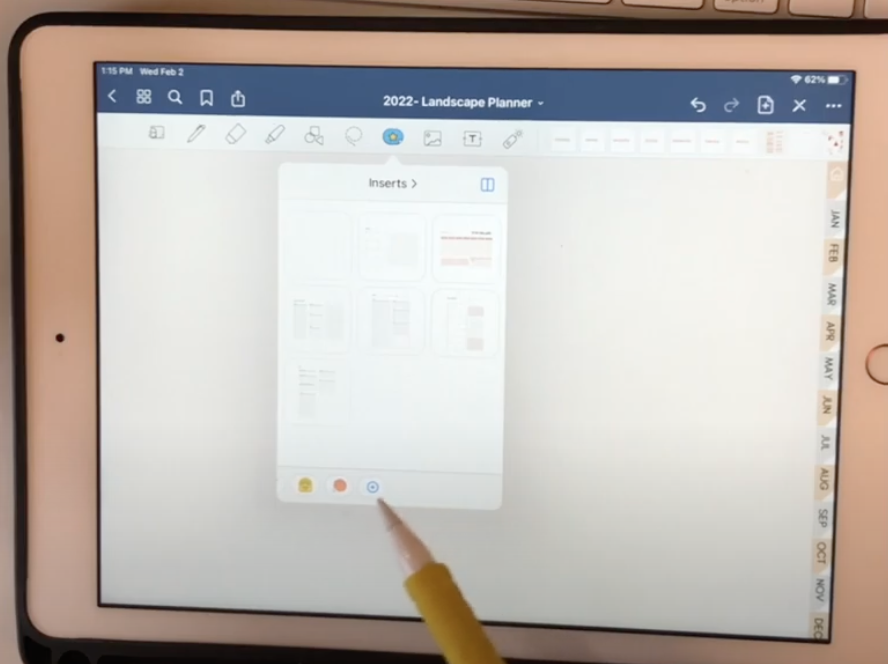
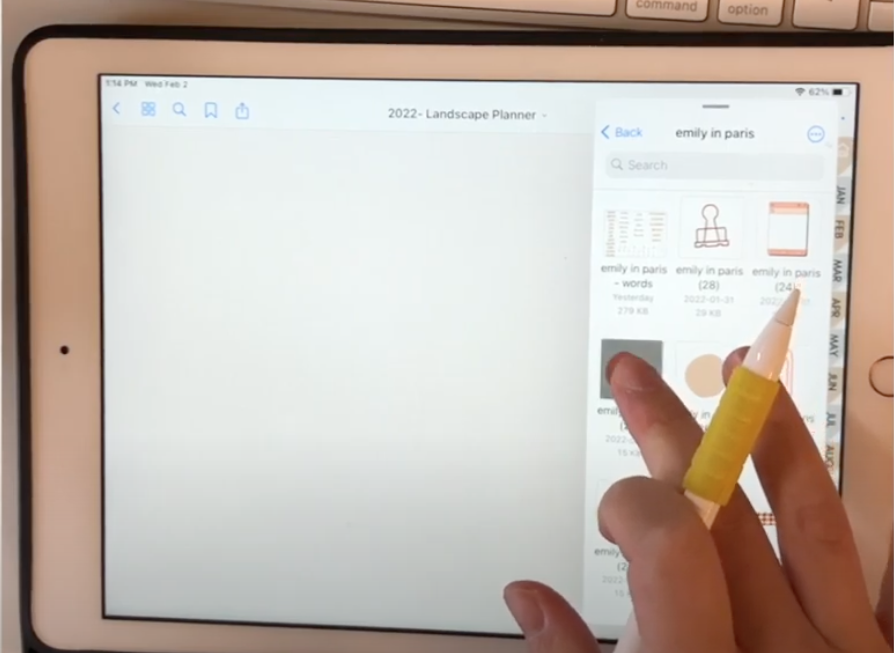
Goodnotes Elements feature
- Open the feature and at the bottom, scroll to the the “+” and add your new collection
- You’ll be able to organize them by sets, and name each set
- Either add stickers that are currently on your page, import from a file or photo album
watch our video for more detailed tips!
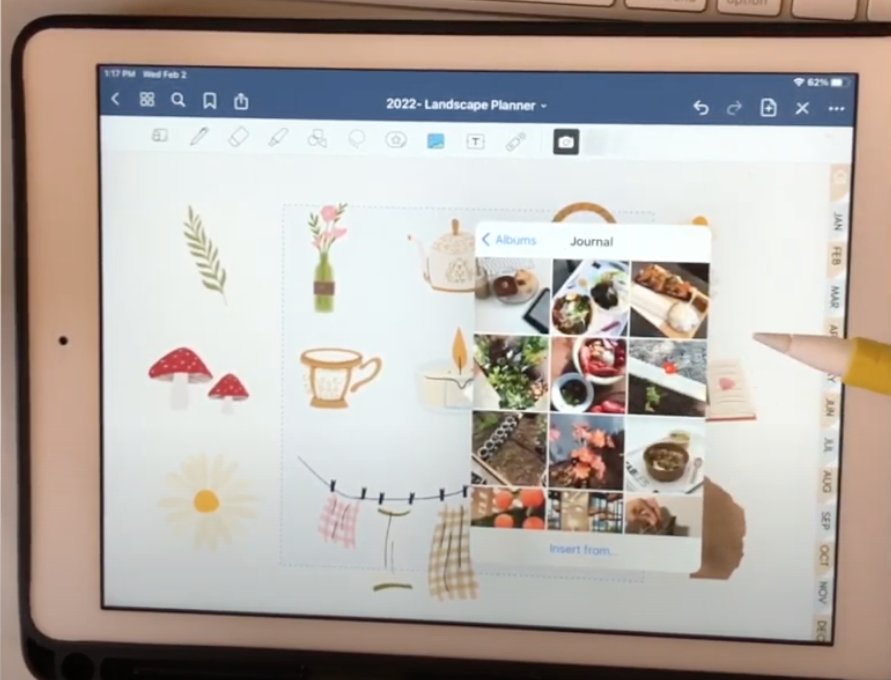
Using the image button
- click the image button and add the select an image from your photo album
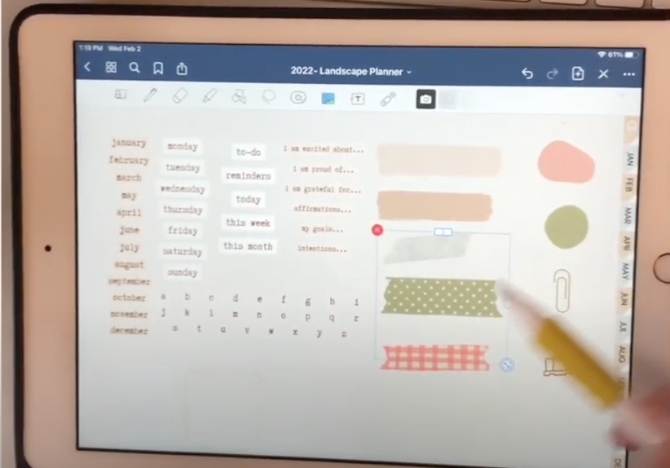
How to move and edit your stickers
Moving stickers
- lasso tool
- great for grabbing more than one image
- image tool
- great for hard to grab stickers in tight spaces
Editing stickers
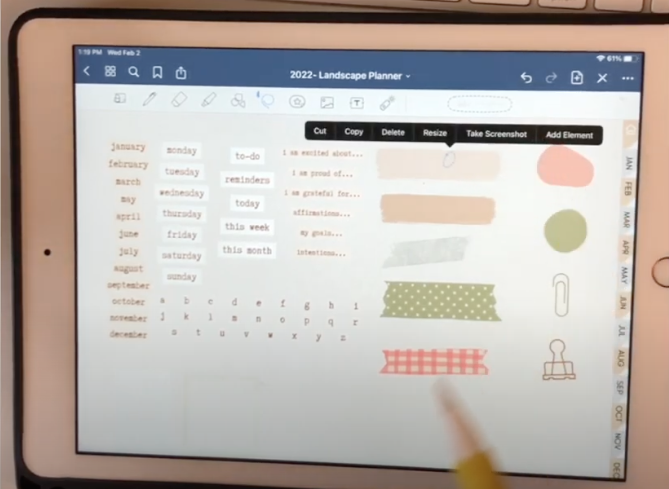
- lasso tool
- cut
- copy
- delete
- resize
- take screenshot
- add to Element
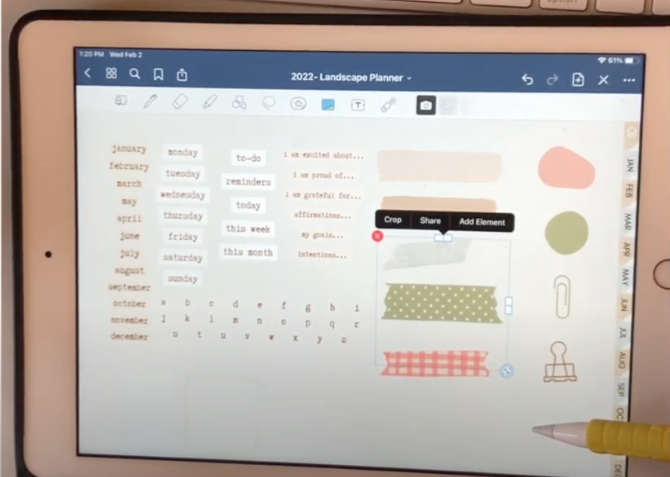
- image too
- crop
- share
- add to Element
Which file type should I use?
PNG files works the best!
- This is because PNG files allows for transparent background.
- If your image does have transparent background, you’ll be able to layer your stickers so it looks more realistc!