Disclosure: This website is a participant in various affiliate programs, including the Amazon Services LLC Associates Program, an affiliate advertising program designed to provide a means for sites to earn advertising fees by advertising and linking to Amazon.com. As an Amazon Associate, we earn from qualifying purchases. We also participate in other affiliate programs and may earn commissions through purchases made through our links. Any opinions, reviews, recommendations, or endorsements expressed on this site are our own and are not influenced by any third-party products or services being promoted.
Lately, I’ve been seeing these new “magic” stickers all over Etsy, and of course, I had to find out how they’re made!
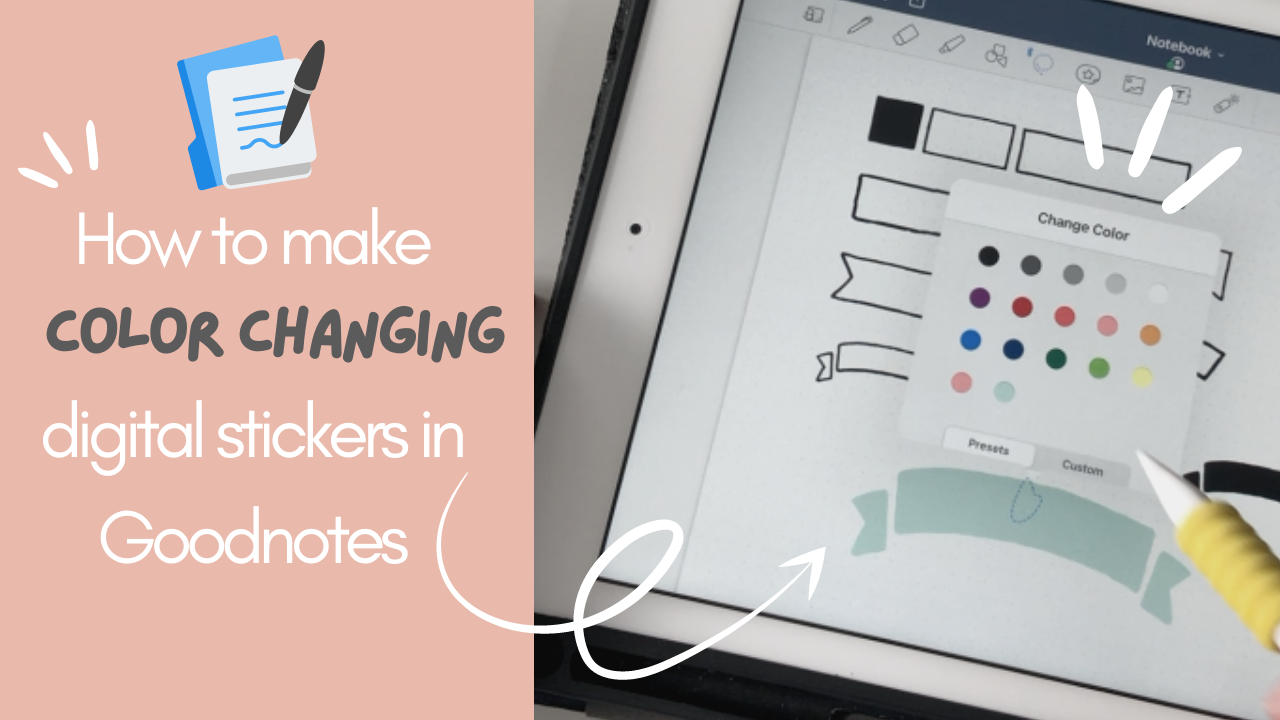
In this tutorial, I’ll walk you through how to make editable GoodNotes stickers that are quick to create and so much easier to use than sorting through dozens of regular PNG stickers. The best part? You can store them directly in your GoodNotes Elements for seamless use in all your planning and note-taking sessions.
Here’s the real magic… you can change them to any color you like. That means you only need one set of functional stickers for all your themes and layouts!
Things mentioned in this video:
✦ SHOPS that sell “magic” stickers ✦
- Dash Planners on Etsy – https://tidd.ly/3tv4pyq
- Widescreen Education on Etsy – https://tidd.ly/3twWqAM
✦ Sites for dingbat fonts ✦
- Dafont – https://www.dafont.com
- Creative Market – https://bit.ly/2Ld9kln
- Creative Fabrica – https://bit.ly/3g1KDF2
✦ VIDEO: How to install fonts on your iPad ✦
Note: This sticker method only works if the fonts are installed on your iPad.
What's covered in this post
Watch along on YouTube!
Instagram // YouTube // Etsy Shop
What are editable GoodNotes stickers?
These stickers are designed right inside GoodNotes, making them incredibly easy to use. Because they’re editable, you can change the colors anytime, meaning one sticker set can match all your planning spreads.
I experimented by making my own using dingbat fonts—fonts that contain symbols instead of letters. They’re perfect for creating functional planning icons, shapes, and even decorative washi tape.
Where to find dingbat fonts
Here are my go-to sources:
- Dafont – Free to use (check license for each font)
- Creative Fabrica – Offers subscriptions for unlimited downloads, great for variety
- Creative Market – Includes commercial licenses for selling your creations
Tip: Dafont is great for freebies, but always check the usage rights. Creative Market and Creative Fabrica usually include a commercial license, which is ideal if you plan to sell your sticker sets later.
How to install fonts on your iPad
Follow my YouTube tutorial for a step-by-step guide on installing fonts so they work in GoodNotes.
Using your new fonts in GoodNotes
Pro tip: If GoodNotes doesn’t recognize your new font right away, close the app completely and reopen it.
Each letter or character in the dingbat font represents a shape or design. Once you’ve typed out your chosen symbols, convert them into Elements in GoodNotes so you can reuse them instantly in future spreads—no cropping required. You can even change their colors to match your current theme.
For editable washi tape, choose a solid block pattern dingbat font, type a string of symbols, recolor it, and save it as an Element. It’s functional, customizable, and a huge time-saver.
Reminder: These dingbat stickers only work if the font is installed on your iPad. Without it, they’ll appear as the letter or symbol code instead of the icon.